Base & Upright Systems... |
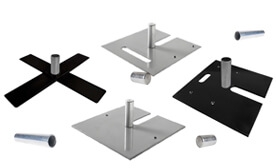
 Slip-Fit System - This system is the most commonly used today. It refers to the way the upright slips over the small metal "nipples" which are screwed into the bases. The downside to this system is the akwardness of moving and storing the bases w/ nipples. Some bases have notches cut out to allow multiple stacking or you can unscrew the nipples to ease in storage and transport.. Nipples are often made of steel or aluminum. We recommend aluminium because they're lighter, easier to handle, and they won't rust. Slip-Fit System - This system is the most commonly used today. It refers to the way the upright slips over the small metal "nipples" which are screwed into the bases. The downside to this system is the akwardness of moving and storing the bases w/ nipples. Some bases have notches cut out to allow multiple stacking or you can unscrew the nipples to ease in storage and transport.. Nipples are often made of steel or aluminum. We recommend aluminium because they're lighter, easier to handle, and they won't rust. |
 Screw-In System - This system is often referred to as the "old style" and doesn't involve the use of the metal "nipples". Instead, the uprights themselves have threaded ends which screw directly into the bases. The major drawback to this system is that the bases or uprights can easily have their threads damaged. On the plus side, because the bases don't have protruding metal nipples, they are easier to move and store. Screw-In System - This system is often referred to as the "old style" and doesn't involve the use of the metal "nipples". Instead, the uprights themselves have threaded ends which screw directly into the bases. The major drawback to this system is that the bases or uprights can easily have their threads damaged. On the plus side, because the bases don't have protruding metal nipples, they are easier to move and store. |
|
|
Bases |
 Weighted Bases - Weighted bases come in a variety of sizes and weights. They are usually powder-coated black or zinc coated. The higher the pipe, the heaver and larger your base needs to be. Here are some approximate height to weight/size recommendations: Weighted Bases - Weighted bases come in a variety of sizes and weights. They are usually powder-coated black or zinc coated. The higher the pipe, the heaver and larger your base needs to be. Here are some approximate height to weight/size recommendations:
3-5 ft = 8" x 14" 6lbs
5-14 ft =18" x 18" 17lbs
14-20 ft = 24" x 24" 29lbs
Tip: If you are concerned about your bases being too small or light, you can always add sandbags. |
 Unweighted (Underweighted) Bases - Unweighted bases are just as effective as weighted bases and whether you consider them more or less convenient than weighted bases is entirely up to personal preference. These bases are constructed out of thinner, less-heavy metal and utilize sandbags to give them the necessary weight when installed. A major plus to unweighted bases is their relatively low cost to ship and we usually recommend them to our international customers for this reason. The downside is that they create a higher and 'less sleek' profile which is usually not suitable for installations where both sides of the drape are visible. Unweighted (Underweighted) Bases - Unweighted bases are just as effective as weighted bases and whether you consider them more or less convenient than weighted bases is entirely up to personal preference. These bases are constructed out of thinner, less-heavy metal and utilize sandbags to give them the necessary weight when installed. A major plus to unweighted bases is their relatively low cost to ship and we usually recommend them to our international customers for this reason. The downside is that they create a higher and 'less sleek' profile which is usually not suitable for installations where both sides of the drape are visible. |
|
|
Adjustable Uprights |
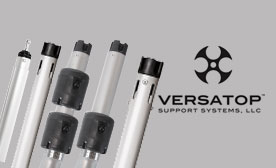
 The uprights are the vertical metal poles which rest on the bases and are connected together with the drape supports. If you only need to erect a single standard height over and over again, you can use fixed uprights. But for most event companies, Adjustable Uprights are the best choice. Adjustable Uprights are made out of machined aluminum and come in a variety of sizes. You will find 1.5" diameter and 2" diameter in the marketplace but we strongly encourage the use of 2" due to it's strength, durability and suitability for commercial use. The uprights are the vertical metal poles which rest on the bases and are connected together with the drape supports. If you only need to erect a single standard height over and over again, you can use fixed uprights. But for most event companies, Adjustable Uprights are the best choice. Adjustable Uprights are made out of machined aluminum and come in a variety of sizes. You will find 1.5" diameter and 2" diameter in the marketplace but we strongly encourage the use of 2" due to it's strength, durability and suitability for commercial use. |
|
|
Upright Locking Mechanisms & Methods |
 Locking Clamp Locking Clamp - This system allows for an infinite number of height settings and it is one of the most durable locking mechanisms for adjustable uprights. On the downside, it can sometimes get tricky to get them all at the same height and it is prone to smashing fingers if you let go of the upright while unclamped. |
 Button-Lock - This system is not as likely as the locking clamp to result in injuries to your hands and the button lock positions ensure equal and consistent heights. On the downside, you are limited to the button lock positions for the overall height and the button locks are not as durable as the locking clamps or slip-lock system. Button-Lock - This system is not as likely as the locking clamp to result in injuries to your hands and the button lock positions ensure equal and consistent heights. On the downside, you are limited to the button lock positions for the overall height and the button locks are not as durable as the locking clamps or slip-lock system. |
 Button-Lock w/ Locking Clamp - As the name suggests, this system combines both button locks and locking clamps. If you don't like the button lock position, go ahead and go between them and clamp it instead. This is a nice system however because it includes both locking features, it is priced slightly higher. Button-Lock w/ Locking Clamp - As the name suggests, this system combines both button locks and locking clamps. If you don't like the button lock position, go ahead and go between them and clamp it instead. This is a nice system however because it includes both locking features, it is priced slightly higher. |
 Slip-Lock - The Slip-Lock collar assembly locks automatically when the inner pole is raised vertically to the desired height. As a vertical load is applied downward, the ball-taper lock feature locks tighter. The more pressure applied downward, the tighter it will lock. To release the lock, simply raise the inner pole slightly and lift the release ring. Slip-Lock - The Slip-Lock collar assembly locks automatically when the inner pole is raised vertically to the desired height. As a vertical load is applied downward, the ball-taper lock feature locks tighter. The more pressure applied downward, the tighter it will lock. To release the lock, simply raise the inner pole slightly and lift the release ring. |
Drape Supports |
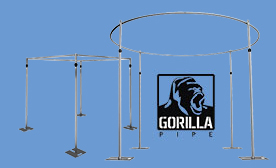
 Drape supports are the easiest part of a pipe and drape system to understand. They are simply pipes which connect the uprights via hooks through the notches at the top of the uprights. Draping is either applied by sliding it through rod pockets in the drape or the draping can be simply thrown over the top. Drape supports are usually adjustable and often have button locks at certain intervals. However because the button locks aren't really doing much, you can easily set them between the button positions without any problems. As for which length to choose, the longer the drape support is, the more difficult and expensive it becomes to ship and transport. You must also keep in mind that heavy drape installations can begin to stress and bend the longer supports. Because of this, we usually recommend our #1 selling length which is the 6ft-10ft support. 7-12 foot supports are also popular, however once you hit that 7-foot point the shipping costs tends to increase dramatically and they can start to become difficult to transport in some vehicles. Drape supports are the easiest part of a pipe and drape system to understand. They are simply pipes which connect the uprights via hooks through the notches at the top of the uprights. Draping is either applied by sliding it through rod pockets in the drape or the draping can be simply thrown over the top. Drape supports are usually adjustable and often have button locks at certain intervals. However because the button locks aren't really doing much, you can easily set them between the button positions without any problems. As for which length to choose, the longer the drape support is, the more difficult and expensive it becomes to ship and transport. You must also keep in mind that heavy drape installations can begin to stress and bend the longer supports. Because of this, we usually recommend our #1 selling length which is the 6ft-10ft support. 7-12 foot supports are also popular, however once you hit that 7-foot point the shipping costs tends to increase dramatically and they can start to become difficult to transport in some vehicles. |
|
|
Draping for Weddings & High-Style Events |
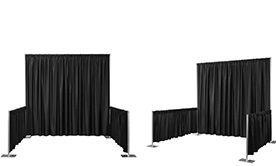
 Draping for weddings and high-style events usually requires the soft, semi-transparent look of sheer. Sheer fabric drapes (especially the larger sizes) can be difficult to find, luckily we are a manufacturer of this product and can make it to suit any need. If you are purchasing drapes somewhere else, make sure they are created with large 4" rod pockets. Most drape installations rely on a base of white sheer which is then adorned with valences and/or additional layers of sheer. You can either use rod pockets to hold the drapes or you can throw the drapes over the top of the drape support and have it come down the other side. This has the added bonus of giving some nice depth and thickness to the display. To achieve the correct level of "bunching" we recommend at least 4 x 300cm panels per 10-foot span of pipe. Draping for weddings and high-style events usually requires the soft, semi-transparent look of sheer. Sheer fabric drapes (especially the larger sizes) can be difficult to find, luckily we are a manufacturer of this product and can make it to suit any need. If you are purchasing drapes somewhere else, make sure they are created with large 4" rod pockets. Most drape installations rely on a base of white sheer which is then adorned with valences and/or additional layers of sheer. You can either use rod pockets to hold the drapes or you can throw the drapes over the top of the drape support and have it come down the other side. This has the added bonus of giving some nice depth and thickness to the display. To achieve the correct level of "bunching" we recommend at least 4 x 300cm panels per 10-foot span of pipe. |
|
|
How to Figure Out What You Need |
 Deciding which pipe and drape components you need can be tricky. The first step is to determine the total height you plan to drape and find a appropriate upright to accomodate your needs. Write this down. The next step is to measure the total distance you need to drape and determine the number of free standing spans. For example, if you want to drape 3 sides of a 100ft x 100ft room where the drape connects at the corners, you would write down 300 feet & 1 span. If you wanted the corners to not connect, this would result in 3 spans. Assuming you plan to use the 6-10 foot drape supports, the single span application would require 30 drape supports, 31 uprights and 31 bases. Every time you "add a span" you need to add an additional upright and base. So the 3-span application would require 30 drape supports, 33 uprights and 33 bases. Many people also find it helpful to sketch a simple diagram to fully envision the setup. Deciding which pipe and drape components you need can be tricky. The first step is to determine the total height you plan to drape and find a appropriate upright to accomodate your needs. Write this down. The next step is to measure the total distance you need to drape and determine the number of free standing spans. For example, if you want to drape 3 sides of a 100ft x 100ft room where the drape connects at the corners, you would write down 300 feet & 1 span. If you wanted the corners to not connect, this would result in 3 spans. Assuming you plan to use the 6-10 foot drape supports, the single span application would require 30 drape supports, 31 uprights and 31 bases. Every time you "add a span" you need to add an additional upright and base. So the 3-span application would require 30 drape supports, 33 uprights and 33 bases. Many people also find it helpful to sketch a simple diagram to fully envision the setup. |
| |




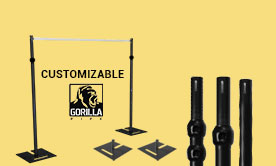
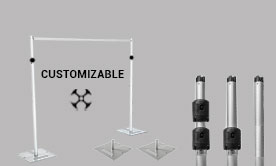
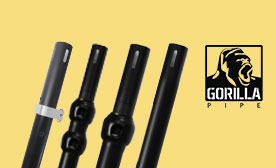
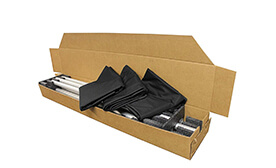
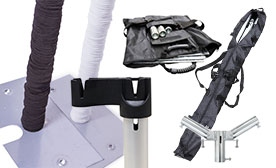


 Slip-Fit System - This system is the most commonly used today. It refers to the way the upright slips over the small metal "nipples" which are screwed into the bases. The downside to this system is the akwardness of moving and storing the bases w/ nipples. Some bases have notches cut out to allow multiple stacking or you can unscrew the nipples to ease in storage and transport.. Nipples are often made of steel or aluminum. We recommend aluminium because they're lighter, easier to handle, and they won't rust.
 Screw-In System - This system is often referred to as the "old style" and doesn't involve the use of the metal "nipples". Instead, the uprights themselves have threaded ends which screw directly into the bases. The major drawback to this system is that the bases or uprights can easily have their threads damaged. On the plus side, because the bases don't have protruding metal nipples, they are easier to move and store.
  Weighted Bases - Weighted bases come in a variety of sizes and weights. They are usually powder-coated black or zinc coated. The higher the pipe, the heaver and larger your base needs to be. Here are some approximate height to weight/size recommendations:
 Unweighted (Underweighted) Bases - Unweighted bases are just as effective as weighted bases and whether you consider them more or less convenient than weighted bases is entirely up to personal preference. These bases are constructed out of thinner, less-heavy metal and utilize sandbags to give them the necessary weight when installed. A major plus to unweighted bases is their relatively low cost to ship and we usually recommend them to our international customers for this reason. The downside is that they create a higher and 'less sleek' profile which is usually not suitable for installations where both sides of the drape are visible.
 The uprights are the vertical metal poles which rest on the bases and are connected together with the drape supports. If you only need to erect a single standard height over and over again, you can use fixed uprights. But for most event companies, Adjustable Uprights are the best choice. Adjustable Uprights are made out of machined aluminum and come in a variety of sizes. You will find 1.5" diameter and 2" diameter in the marketplace but we strongly encourage the use of 2" due to it's strength, durability and suitability for commercial use.
 Locking Clamp - This system allows for an infinite number of height settings and it is one of the most durable locking mechanisms for adjustable uprights. On the downside, it can sometimes get tricky to get them all at the same height and it is prone to smashing fingers if you let go of the upright while unclamped.
  Button-Lock - This system is not as likely as the locking clamp to result in injuries to your hands and the button lock positions ensure equal and consistent heights. On the downside, you are limited to the button lock positions for the overall height and the button locks are not as durable as the locking clamps or slip-lock system.
 Button-Lock w/ Locking Clamp - As the name suggests, this system combines both button locks and locking clamps. If you don't like the button lock position, go ahead and go between them and clamp it instead. This is a nice system however because it includes both locking features, it is priced slightly higher.
  Slip-Lock - The Slip-Lock collar assembly locks automatically when the inner pole is raised vertically to the desired height. As a vertical load is applied downward, the ball-taper lock feature locks tighter. The more pressure applied downward, the tighter it will lock. To release the lock, simply raise the inner pole slightly and lift the release ring.
 Drape supports are the easiest part of a pipe and drape system to understand. They are simply pipes which connect the uprights via hooks through the notches at the top of the uprights. Draping is either applied by sliding it through rod pockets in the drape or the draping can be simply thrown over the top. Drape supports are usually adjustable and often have button locks at certain intervals. However because the button locks aren't really doing much, you can easily set them between the button positions without any problems. As for which length to choose, the longer the drape support is, the more difficult and expensive it becomes to ship and transport. You must also keep in mind that heavy drape installations can begin to stress and bend the longer supports. Because of this, we usually recommend our #1 selling length which is the 6ft-10ft support. 7-12 foot supports are also popular, however once you hit that 7-foot point the shipping costs tends to increase dramatically and they can start to become difficult to transport in some vehicles.
 Draping for weddings and high-style events usually requires the soft, semi-transparent look of sheer. Sheer fabric drapes (especially the larger sizes) can be difficult to find, luckily we are a manufacturer of this product and can make it to suit any need. If you are purchasing drapes somewhere else, make sure they are created with large 4" rod pockets. Most drape installations rely on a base of white sheer which is then adorned with valences and/or additional layers of sheer. You can either use rod pockets to hold the drapes or you can throw the drapes over the top of the drape support and have it come down the other side. This has the added bonus of giving some nice depth and thickness to the display. To achieve the correct level of "bunching" we recommend at least 4 x 300cm panels per 10-foot span of pipe.
  Deciding which pipe and drape components you need can be tricky. The first step is to determine the total height you plan to drape and find a appropriate upright to accomodate your needs. Write this down. The next step is to measure the total distance you need to drape and determine the number of free standing spans. For example, if you want to drape 3 sides of a 100ft x 100ft room where the drape connects at the corners, you would write down 300 feet & 1 span. If you wanted the corners to not connect, this would result in 3 spans. Assuming you plan to use the 6-10 foot drape supports, the single span application would require 30 drape supports, 31 uprights and 31 bases. Every time you "add a span" you need to add an additional upright and base. So the 3-span application would require 30 drape supports, 33 uprights and 33 bases. Many people also find it helpful to sketch a simple diagram to fully envision the setup.


